Selected colour swatches
You can order up to 20 colour swatches
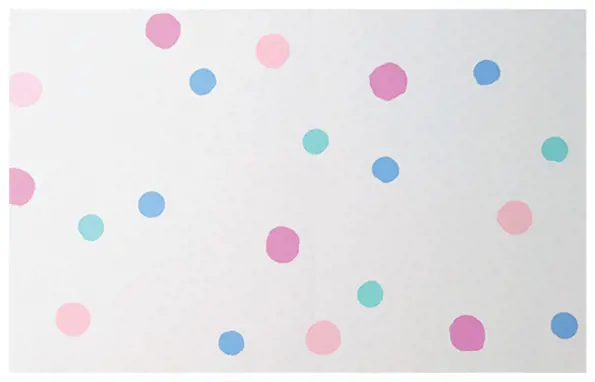
How to create a Polka Dot Wall
Adding polka dots to a wall is a simple way to bring colour and a playfulness to a nursery or bedroom. This project can be completed in under 2 hours and is a project people with any level of painting experience can complete.

Step one
Choose your colours from the British Paints colour wall, and tint these into British Paints sample pots. Here we have used Reckless Green, Barberalla, Pink Dolly and Distant Shore.
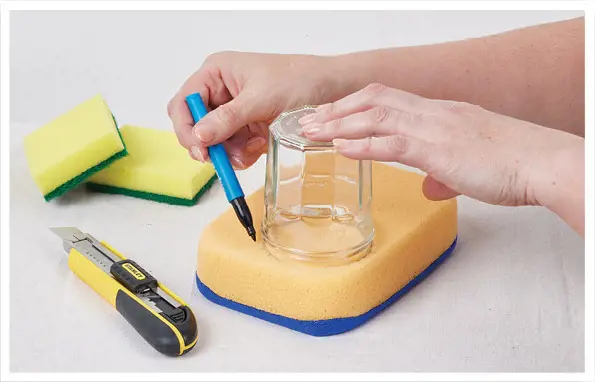
Step two
Create your stamps. Trace a circle around glasses onto your sponges. Cut the sponges out with scissors or safely with a blade. Create a polka dot stamp for each colour. Here we have 4 colours so have cut out 4 different size circles.
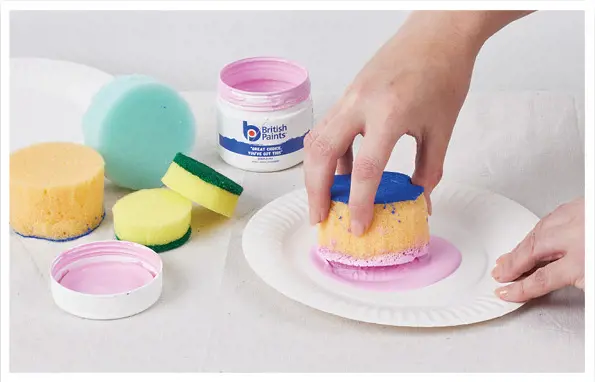
Step three
Pour out your sample pot colours onto paper plates. Have a play with the sponges on the paper plates, try twisting the sponge on the plate, to prepare yourself for stamping onto the wall.
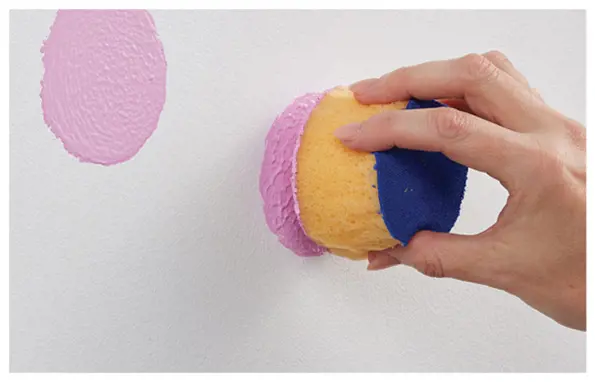
Step four
Get stamping! Try twisting the sponge a little while in contact with the wall to get even paint coverage. Keep the pattern random and switch between colours to create your polka dot wall. Stand back regularly to check your progress.
| WHAT YOU'LL NEED | |
 |
BRITISH PAINTS* SAMPLE POTS IN VARIOUS COLOURS |
|
SPONGES |
|
DISPOSABLE PAPER PLATES |
|
SCISSORS OR CUTTING BLADE |