Selected colour swatches
You can order up to 20 colour swatches
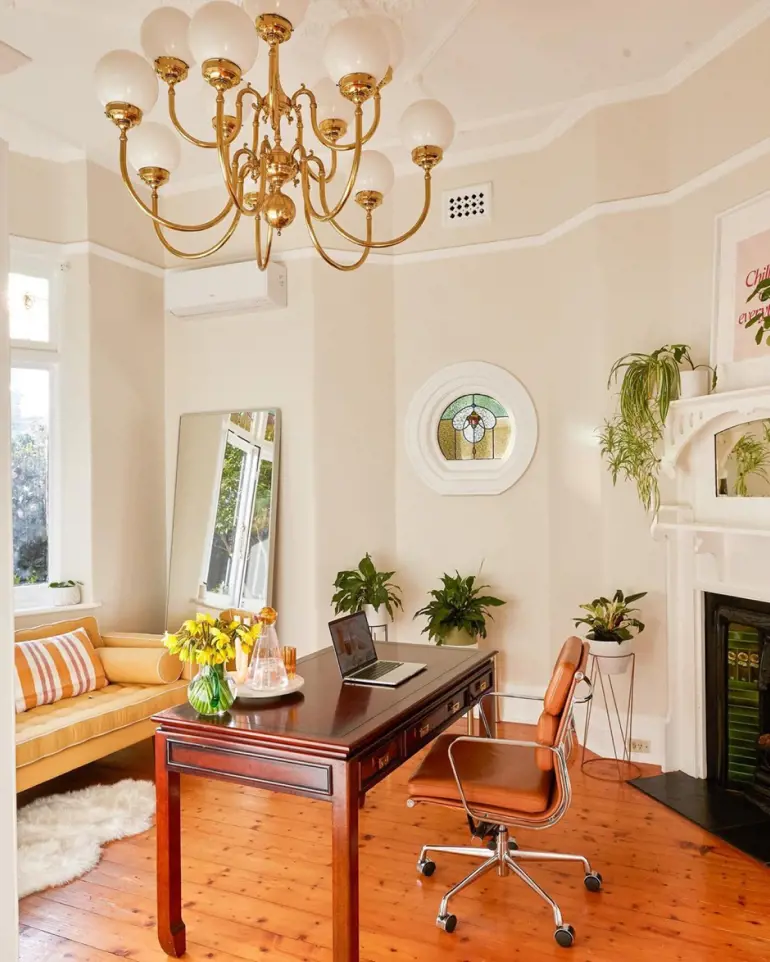
Jess Nguyen’s epic home office makeover
Just a few simple steps to a completely new look!
Spare rooms often go untouched as the project you’ve been meaning to get to but never have time to complete. After all, painting an entire room can seem like an intimidating task!

Jess in her stunning new home office! Image: Jess Nguyen
But home cooking and style influencer Jessica Nguyen proves it can be done, by turning her blah-looking spare bedroom into a chic and cosy home office!
“Since moving into my home over two years ago, I’ve always wanted to repaint and re-style my spare bedroom,” Jess explains.
“It’s from the Edwardian period (1900-1910) with 3.6m ceilings and plenty of detailing from 12 wall surfaces, cornices, ceiling panels, a fireplace and a circular window.
“I was definitely daunted by the prospect of painting such a large room, but I decided to take the plunge last month, using British Paints Paint & Prime to take my walls from green to white.”
Before and After

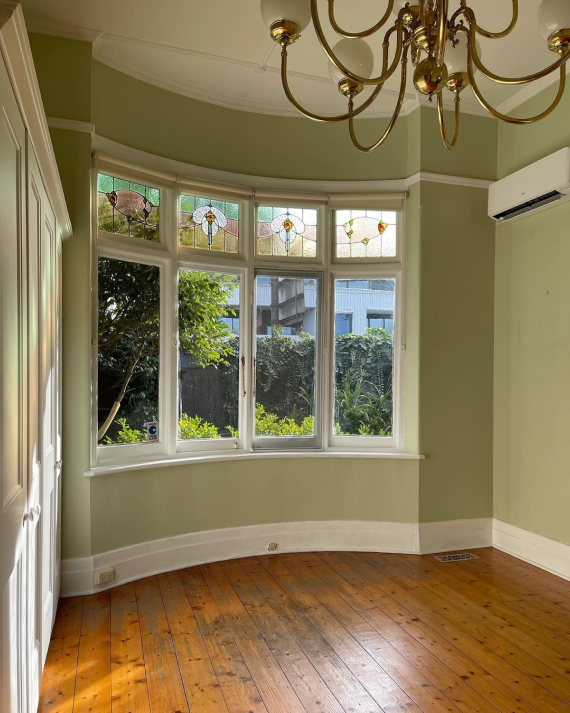
Jess wanted to lighten up her green spare room and turn it into a home office. Image: Jess Nguyen
In five easy steps, Jess shows how she did it:
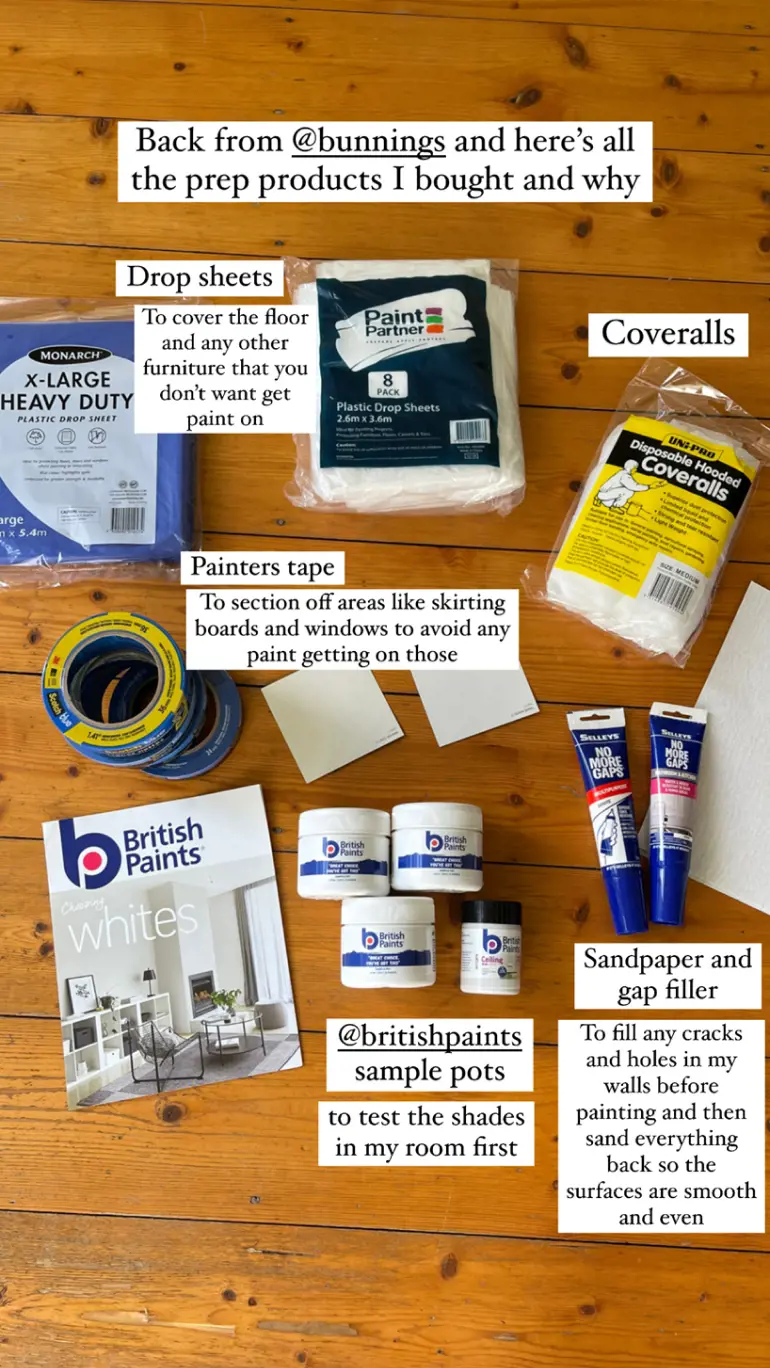
Step 1: Prepare the room
Before the painting can begin, it’s important to ensure that you have the right tools for the job and that your surface is prepped.
To get started, Jessica headed to Bunnings Warehouse, where she picked up:
- Paint rollers
- Brushes
- A drop sheet
- Painters’ tape
- Coveralls
- Sandpaper
- Gap filler
Next, Jessica removed all the furniture from the room, secured the drop sheet and taped off the places she didn’t want to paint. If you have a trim or detailing that will be a different colour to your walls, tape these off around the edges for a clean finish.
Finally, you’ll use your sandpaper and gap filler to fill in any gaps or cracks in the walls. Apply your gap filler then follow with a light sand and wipe down to ensure you have a smooth surface.
Prepping can be the hardest part of a painting project, but Jessica says to think of it like skincare, an important step for a beautiful finish.
“Think of painting prep as skincare and painting as makeup,” Jess says.
“Ultimately, if you don’t put the effort into a good skincare routine – paint prep – then your overall makeup – paint – won’t look great.”
Step 2: Choose your colour
Now it’s time to pick your paint colour! During her Bunnings trip, Jess had also picked up some British Paints paint swatches and 250mL sample pots.
“I wanted to open up the room with white, while still keeping the colour warm to complement the period style of my home,” Jess explains.
“Since there are so many lovely, intricate features in my room, I also decided to use a contrasting white on all trimmings to highlight this unique detail.
“Picking whites can sometimes be overwhelming or confusing. The Colour Wall Assistant makes it easy to access free, professional colour advice from the comfort of your home and is always a good place to start your colour selection journey.”
“Once you’ve narrowed it down, I recommend grabbing a few paint swatches in varying tones to compare each one. Next, you’ll need to buy a couple of 250ml sample pots of your favourite shades to try at home.”
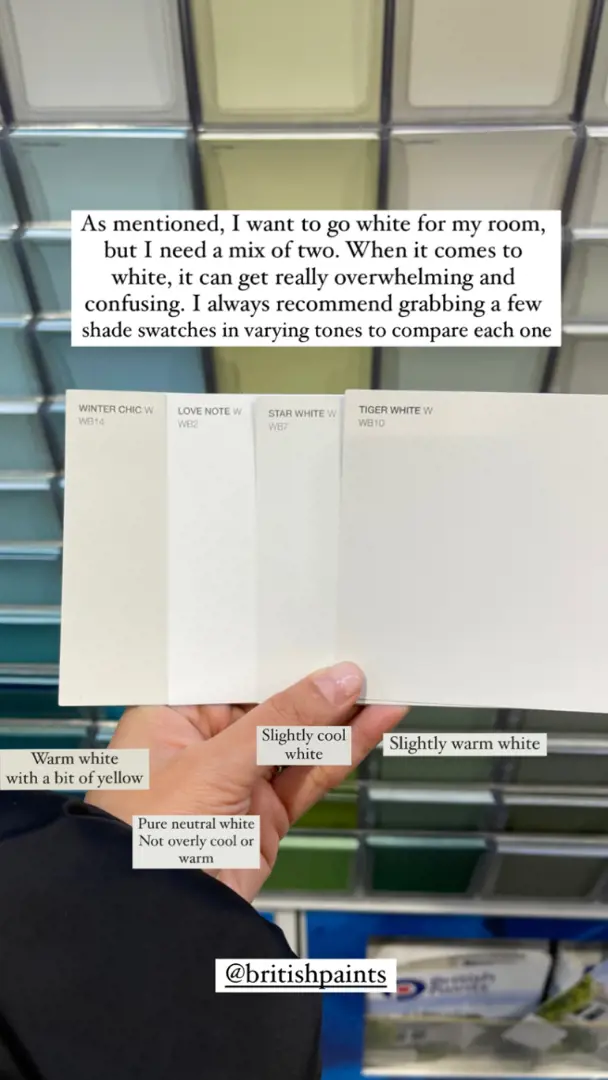
It’s always a good idea to grab a few swatches to take home. Image: Jess Nguyen
To test her paint at home, Jessica used large pieces of MDF and painted a colour on each piece so she could experience it. Remember, colours can look different depending on the lighting, so testing them out using sample pots will save you from buying a whole can of a colour you don’t love.
After testing out a few different colours at home, Jess decided to go with British Paints Winter Chic for her walls and Love Note for her trim and ceiling.

Step 3: Find the right paint for the job
Choosing the right paint will make any painting project much easier. Jess selected British Paints Paint & Prime Interior for her walls, plus Paint & Prime Ceiling and Paint & Prime Doors, Windows, and Trim.
The ideal paint for any interior or exterior project, Paint & Prime combines an undercoat and topcoat in one, saving time and providing a beautiful finish fast. With superior hiding power, British Paints Paint & Prime helps mask repairs and colour changes in two, easy to apply coats.
Picking the right finish will ensure great results that last longer. Low sheen is ideal for walls because it’s hard-wearing and gives a velvety finish. For detailing or areas prone to dampness, a semi-gloss paint is the way to go. Pick a flat finish for ceilings to create a soft, diffused light. The thicker consistency of ceiling paint will also help prevent drips on your face as you paint!
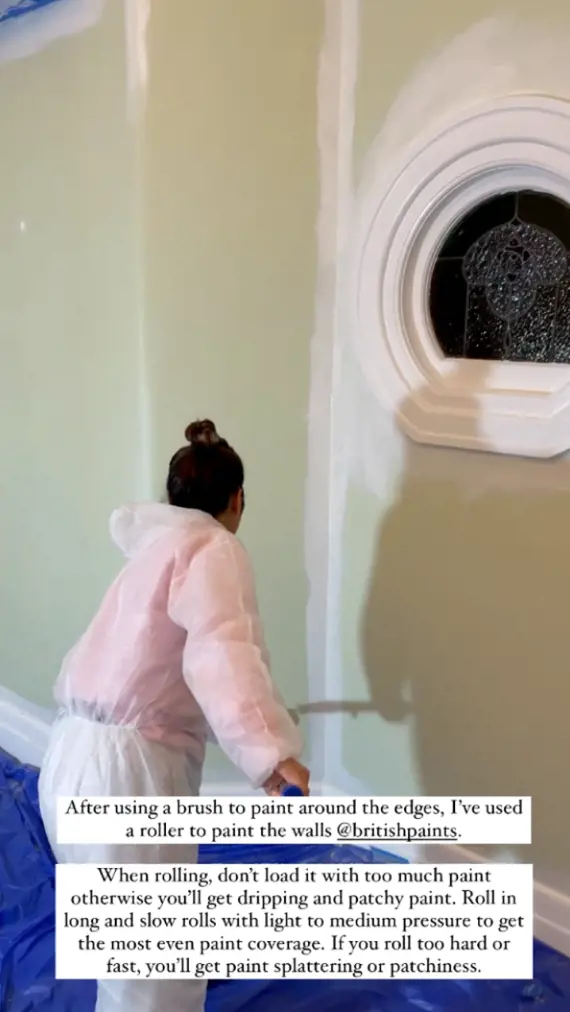
Step 4: Get painting
Now for the fun part, painting!
“Paint & Prime was perfect for this project because it was really easy to use, and I didn’t need to buy an additional primer to get the job done,” Jess explains.
“In just two coats of paint, Paint & Prime took my walls from green to white, which I was really surprised by.”
Jess used a roller to paint her walls. She recommends using long and slow strokes with medium pressure for the perfect finish. To avoid drips, make sure you don’t load up the roller with too much paint.
‘When using a paint roller, don’t load your roller with too much paint, overwise you’ll get dripping and patchy paint,” she says.
“You’ll want to roll in long, slow strokes with light to medium pressure to get the most even paint coverage.”
Always be careful not to overload your roller with too much paint! Image: Jess Nguyen
For detailing like cornices or windows, Jess used a brush to get in all the nooks and crannies. Skilled with a brush, Jess free-handed the edges but if you’re a novice then painter’s tape will be your best friend.
Step 5: Style and enjoy
Now you can step back and admire your handiwork! The paint will be touch dry after two hours and after 24 hours, you’ll be ready to add your furniture back into the room.
Add some of your favourite styling pieces and enjoy the beautiful results of a fresh coat of paint!
Job well done, lady! Image: Jess Nguyen